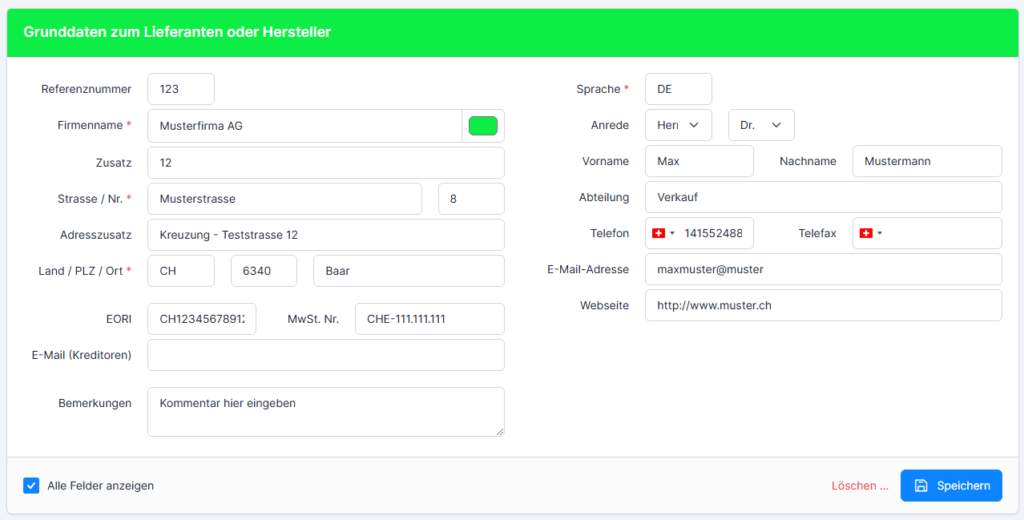
Enter basic supplier data #
To enter a new supplier address, click on +New in the top bar.

Enter the data in the screen that appears. The mandatory fields are marked with a red star. When creating and mutating the address, only basic fields or fields with entered data are displayed. To show all fields, select the Show all fields checkbox.

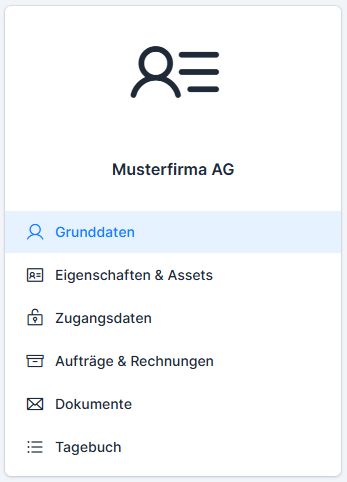
The addresses have several tabs (basic data, properties & assets, access data, orders & invoices, documents and diary), which can be switched between under the contact name.
A contact person can be entered for each address (corresponding fields are displayed when the Show all fields checkbox is activated).
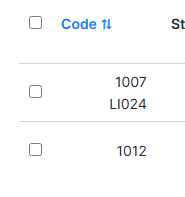
Reference numbers / codes #
Two additional external numbers/codes can be stored as reference numbers: any values can be entered in both fields. By default, only one field is displayed for the reference number.

The 2nd reference number is activated in the settings.
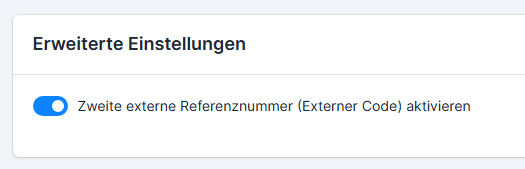
The search for the 2nd reference number is only possible if it is activated.
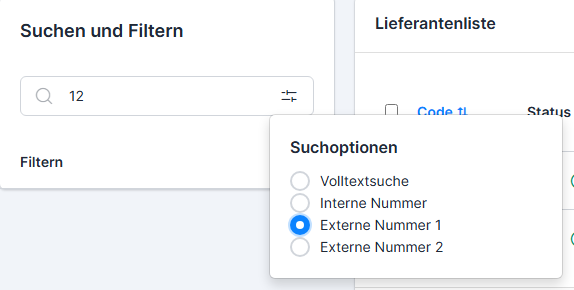
The 1st reference number is displayed in the address overview.
e-mail #
The E-mail (vendors) field is used to enter the e-mail address for vendor receipt.
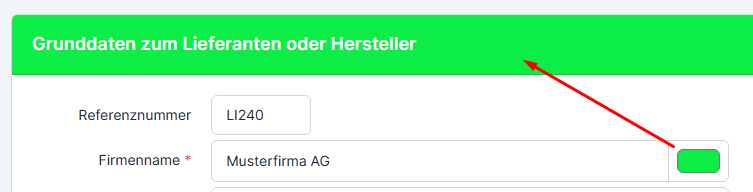
Color highlighting #
Each address can be highlighted in color. To do this, click on the button to the right of the company name and select the desired color in a suitable way:
- by moving the bar
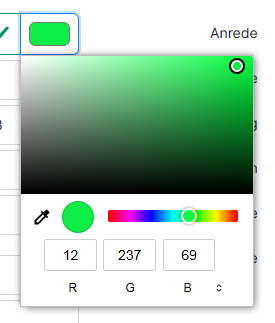
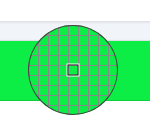
- using the eyedropper tool (click on it, move the magnifying glass tool that appears to the desired color on your screen and click again to select)
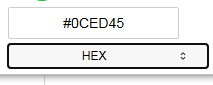
- by specifying RGB/HSL/HEX data – you can switch between these input options.
The set color is used to mark the address.

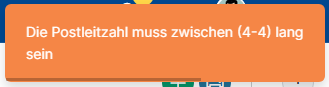
Error during data entry #
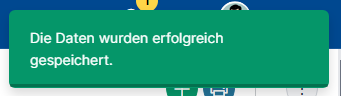
The system checks the data entered. If the entered value/text can be accepted, a green tick appears

If an unacceptable value is entered, a message appears when saving:

The URL of the website must begin with http:// or https://:

An error message appears for some fields (e.g. the zip code length, which is checked depending on the country selected).
If the data has been entered correctly, the system will inform you with a green message when saving.
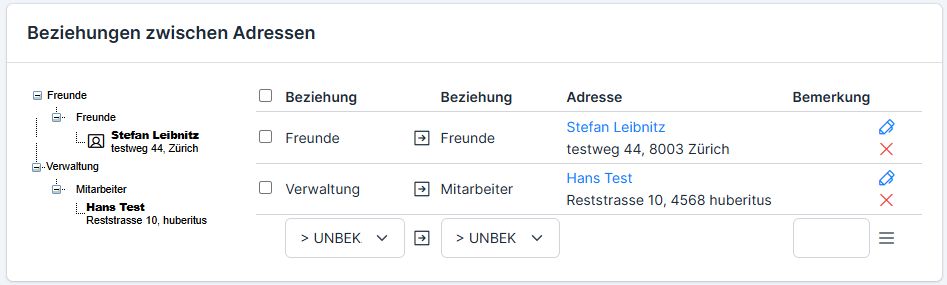
Relationships between addresses #
The addresses can be linked to each other via the relationships. This allows you to create address networks. You can read more about this here: Customer networks
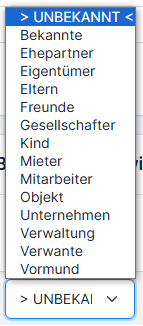
Select the relationship type for the open address 1 (e.g. company), then use the three-bar menu to find the address 2 to be linked from the address book (customer address, supplier address or employee) or create a new supplier address(+ New supplier address) and set its type. You can leave a comment in the Comment field.
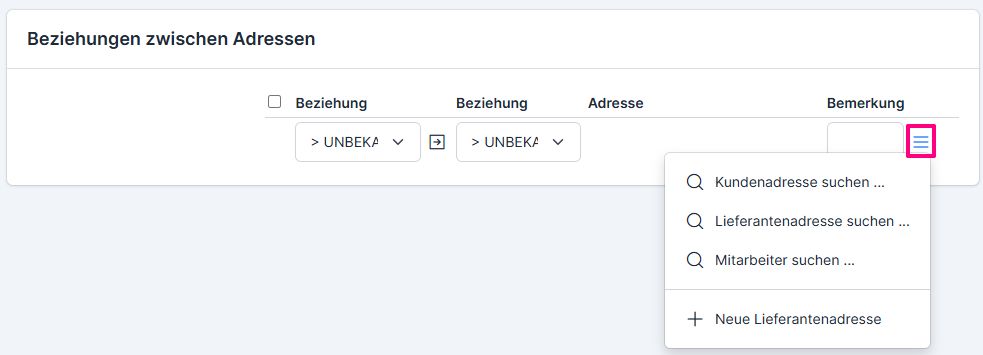
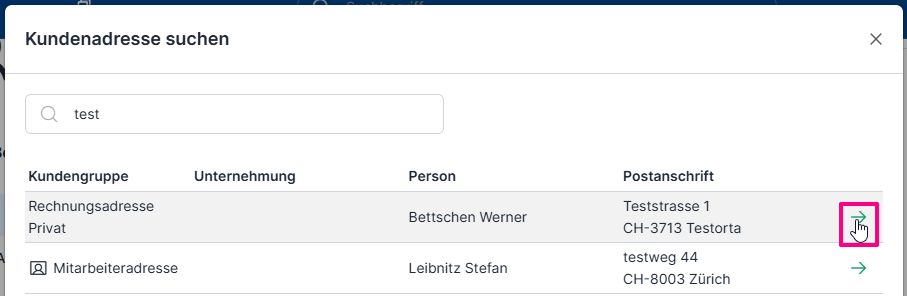
In the screen that appears, find the desired address and click on the arrow button.
The saved relationships can be changed using the pencil button.
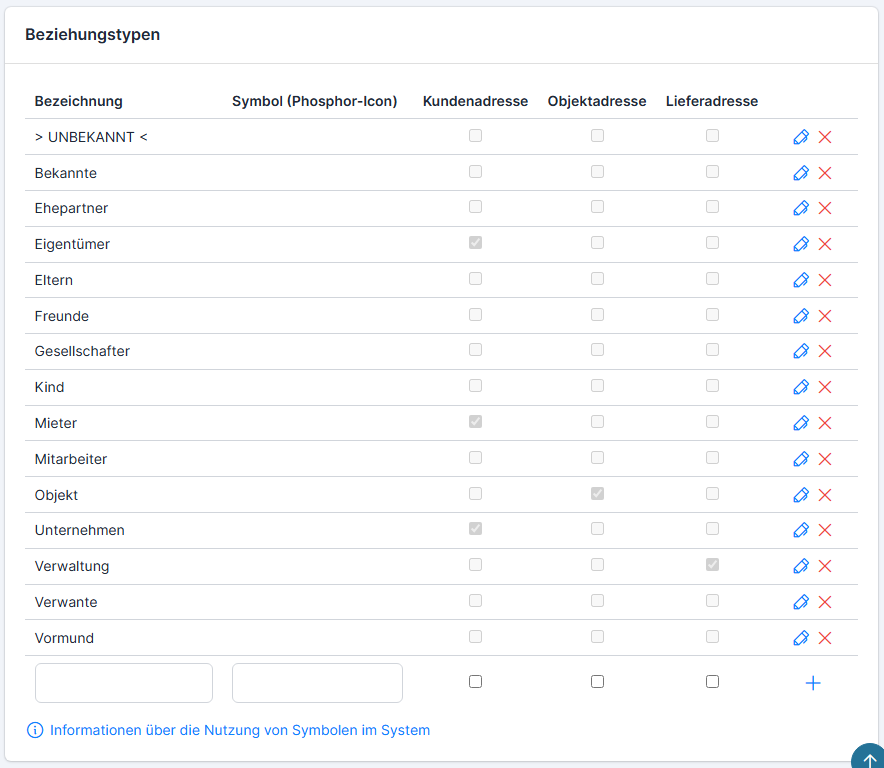
Manage relationship types #
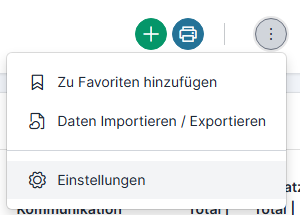
The relationship types are managed in the settings.
Existing relationship types can be deleted and new ones added. The phosphor icon can be stored in the Symbol column – a symbol that appears in front of the address (more on this here: Images, logos and symbols (icons)), in further columns you tick the address groups for which the relationship type can be applied and click Plus to save.
Properties & Assets #
Add extended properties to the supplier address #
Extended properties can be added for the supplier addresses. You can use these to activate properties that can be used to simplify the search.
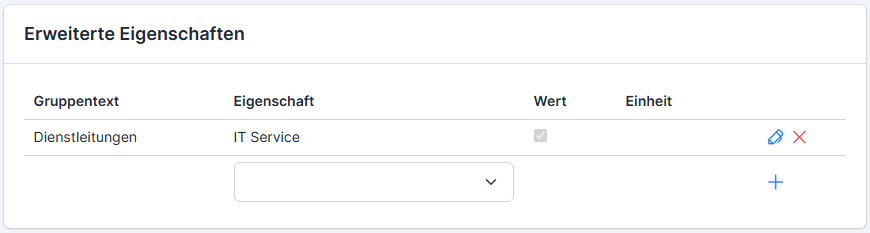
For a property to be selected, it must be stored in the settings.
The properties can be stored for 3 objects: 1 – customer addresses, 2 – employee addresses, 3 – supplier addresses. The three checkboxes in front of the property correspond to these 3 objects. Depending on which checkbox is activated, the property appears in the property search of the object.
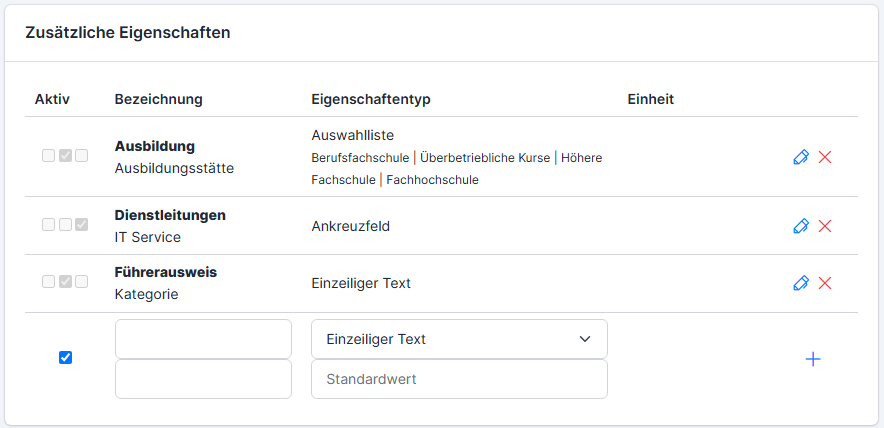
When the property is stored, the object category is set automatically, depending on which module was used to open the settings.
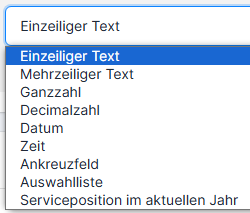
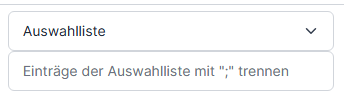
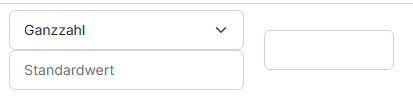
The property can contain a name (upper field – group name, lower field – name of the property), the type (can be supplemented with a default value or a selection list) and a unit for certain types (integer and decimal number).
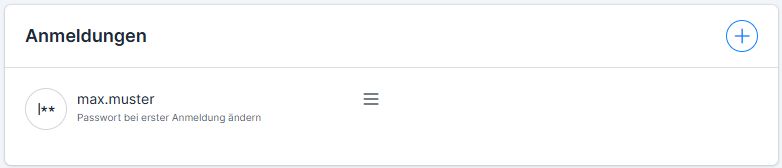
Registrations #
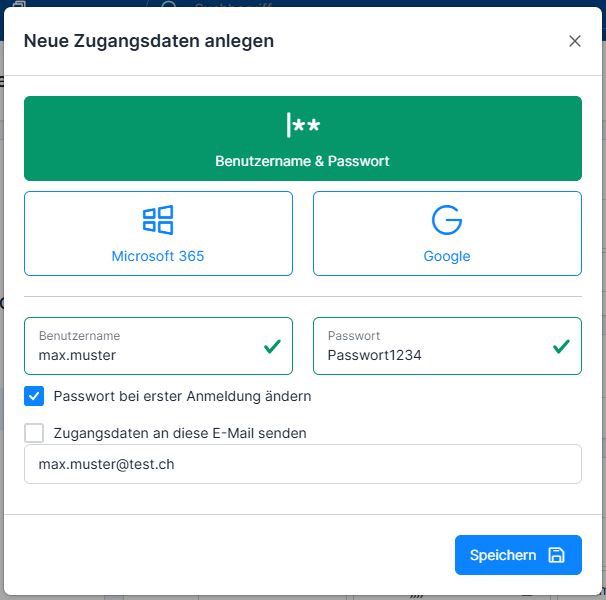
The access data for the suppliers with which you can gain access to the ems system is managed in the Logins area. Click on the plus button to create a new login. To change the existing password, click on the three-bar button.
At the moment, you can log in with a login password, a Microsoft and a Google account.
If the “Change password on first login” option is activated, the user is prompted to reset the password the first time they log in.
The option “Send access data to this e-mail address” sends the stored access data to the specified e-mail address.
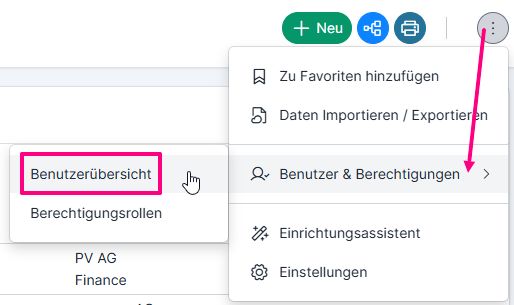
All supplier logins that have been created and entered can be found in the User overview list. This can be found via Supplier addresses → Three-dot menu top right → Users & authorizations → User overview.
To filter out suppliers, select the corresponding checkbox Supplier addresses.
Assignment of the role to employees, customers or suppliers #
The login enables access, the authorization role determines which data the supplier / partner has access to.
The corresponding authorization role is assigned here (you can find out how the authorization roles for suppliers are stored here: Authorization roles for suppliers).
Further information on authorization roles can be found here: Difference between customer groups, properties, authorization roles and relationships
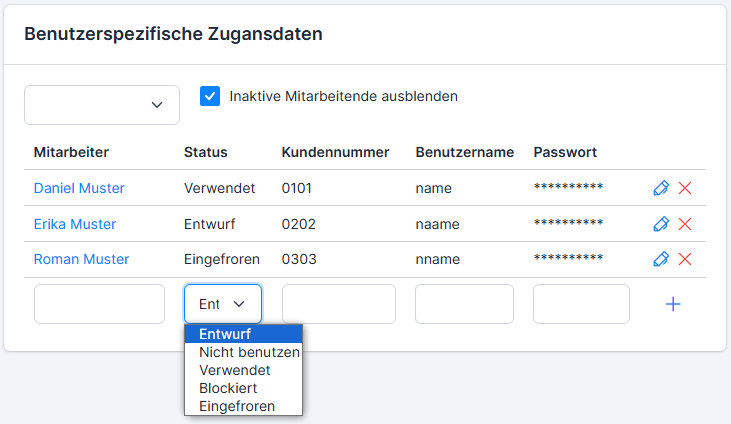
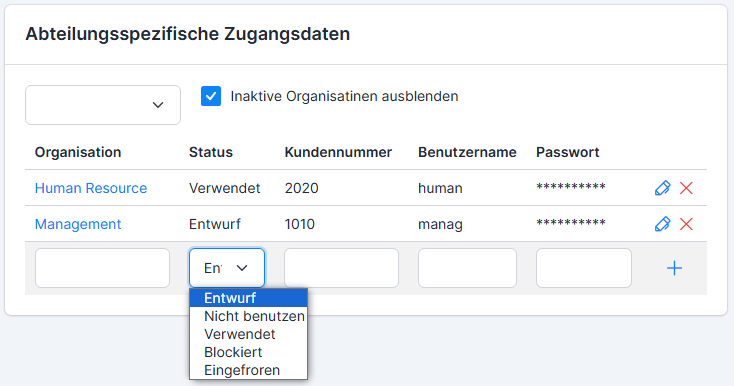
Access data for supplier portals #
If the supplier has a website or a customer portal with access for the customer, the access data for the system users can be stored. To do this, open the Access data tab. You can store either user-specific or department-specific access data here. These can also be provided with a current status.
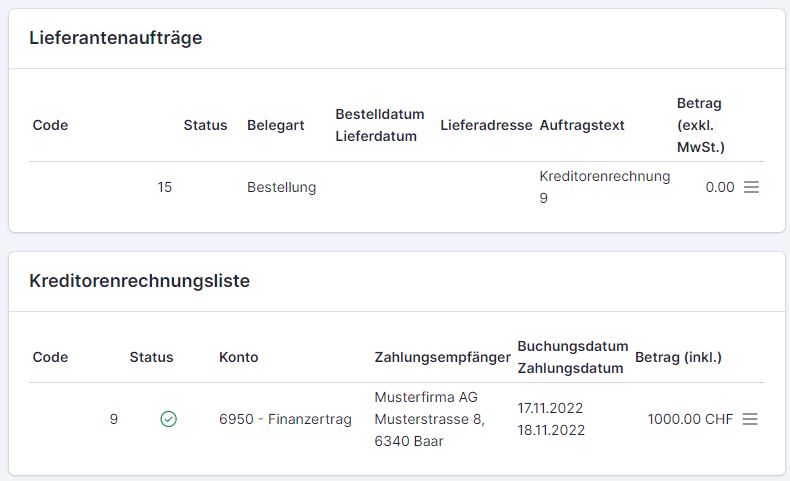
Orders and invoices for the supplier address #
All orders / purchase orders to the supplier as well as the vendor invoices received from the supplier can be found under Orders & Invoices.
Documents for the supplier address #
You can store any number of documents for each supplier address. To do this, use Drag&Drop or Select. You can enter the URL for the file in the field to the right of Drag&Drop.
If the Overwrite files with the same name checkbox is active, a document with the same name will replace one that has already been uploaded. It is suitable for updating files.
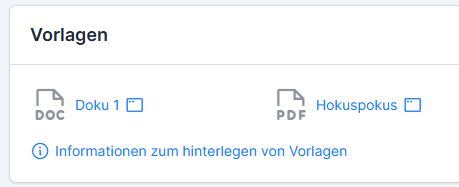
Store templates #
If you would like to upload a document as a template in which the supplier address data is automatically integrated, you can upload this under Templates . You can find out how to work with the templates here: Document templates
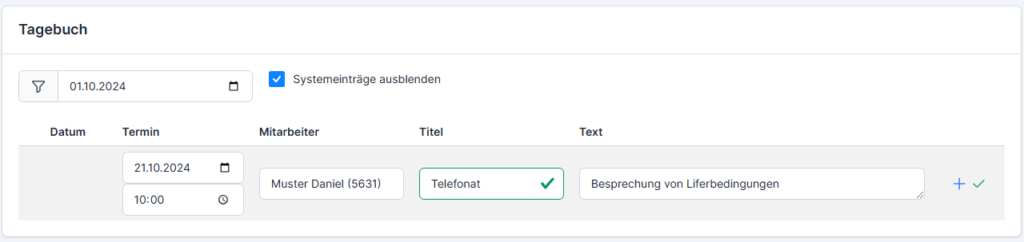
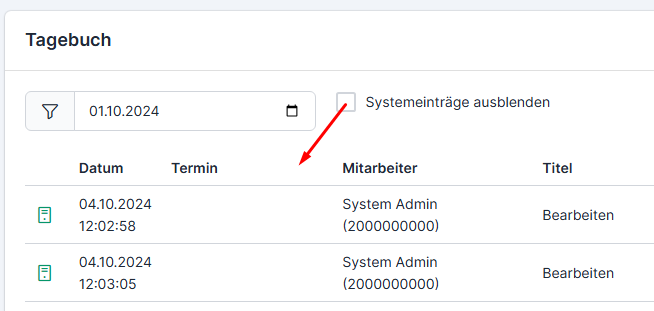
Supplier address diary #
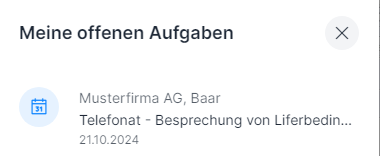
The diary allows you to enter reminders and appointments for employees and yourself for suppliers. Set the appointment, select the employee responsible and describe the task, click on Plus to save.

The employee sees this task on their web start page (versions X2 and X3).

If you want to show the system entries, deactivate the Hide system entries checkbox.
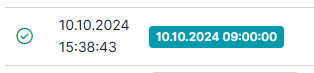
If the task has been completed and released, it is highlighted in green.
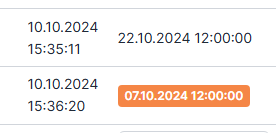
If the date of the task is overdue, it is highlighted in orange.
Read more about changing and managing supplier addresses here: Manage supplier addresses