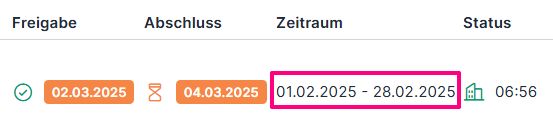
The set visa can be withdrawn in various ways. Please note that the release always relates to the set period. This can be seen in the time recording list, the release list, the employee’s time recording and in the employee profile. If the period is to be changed (for changes in the previous period), this is done via the employee profile (see variant 4).
List of time records
Release list
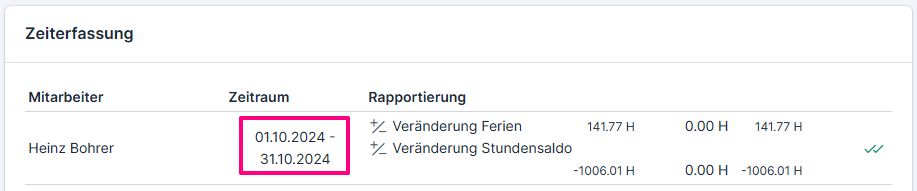
Time recording of the employee

Employee profile → Time recording tab

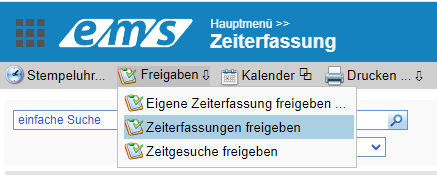
Variant 1: Visa revocation via the report release list #
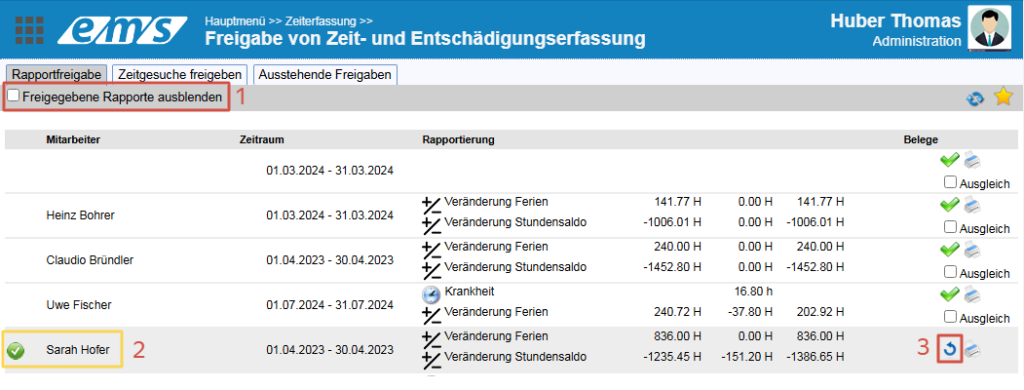
In the normal procedure, all employees who have been approved disappear from the approval list. To display the already viewed reports again, deactivate the “Hide released reports” option (1). All employees are then displayed, including those who have already been reported. You can recognize those that have already been released by the green symbol (yellow frame) (2). You can remove the visa from the employee using the symbol on the right-hand side (3).
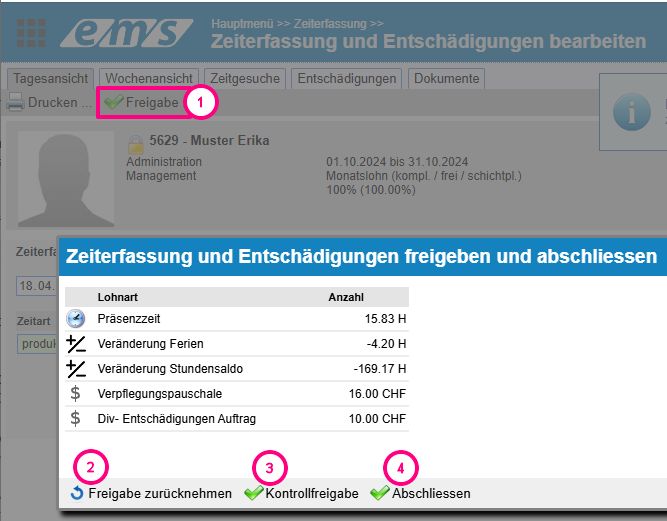
Variant 2: Visa withdrawal from time recording #
Open the employee in normal time recording. The Release button (1) takes you to the brief overview of the employee. Depending on the existing status and your authorizations, you have the option of setting or removing the employee’s (2), project manager’s (3) and / or supervisor’s (4) visa.
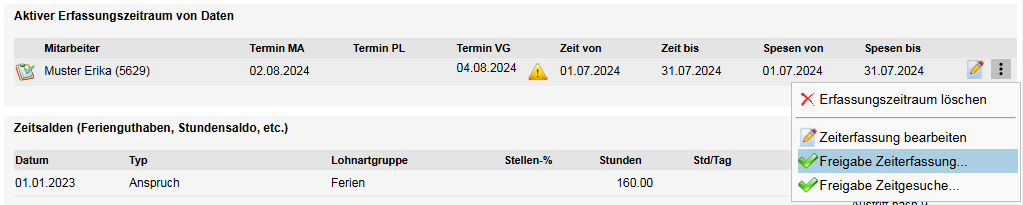
Variant 3: Visa withdrawal via the employee profile #
In the employee profile , open the Time recording tab and in the Active recording period section, click on the three-dot menu on the right and then on Release time recording.
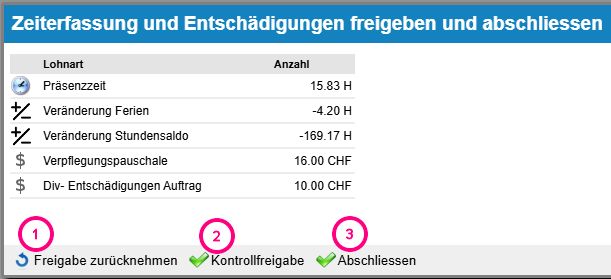
In the screen that opens, as in variant 2, you can revoke the approvals (of the employee (1), if available – of the project manager (2) and of the supervisor (3)).
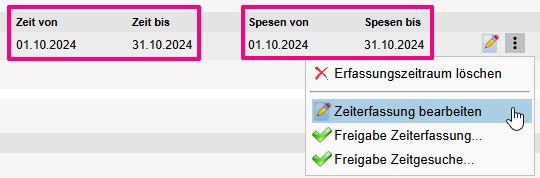
Variant 4: Visa revocation not in the current period #
If the report has been completed and the active entry period has changed to the next month, it is necessary to change the active entry period first in order to withdraw the visa. To do this, open the employee’s profile via the employee administration, in the “Time recording” tab under “Active data recording period”, click on the “pencil” symbol (1). The period to be changed is selected here (2). Finally, press “Save” (3).


Three vertical dots take you to the submenu, select “Approve time recording” and click on “Undo completion” in the next screen.
You can also set a desired period manually (via the calendar /field on the right/ or via the keyboard).


Click on “Edit time recording” to open the dialog window for editing the time recording in the set period (red frame).
After completing the changes in the set period and releasing the report, the recording period must be reset to the current one.